
Click here to download Tonescape® Den Haag.
Tonescape does not assume any tuning as your default, so you begin composing a piece by choosing your tuning.
You must first have already created the tuning which you will use for the piece. (release 1.0 of Tonescape will only allow you to use one tuning per piece -- later you'll be able to mix different tunings, and also change to other tunings after the piece has been composed.) So either use a tuning we've already provided, or create one of your own.
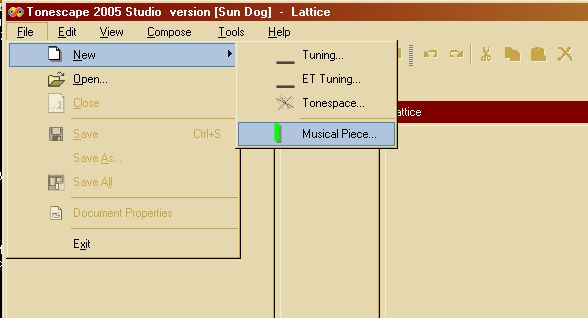
Select "File | New | Musical Piece...".
The "Insert One or More Tuning Systems" dialog opens.
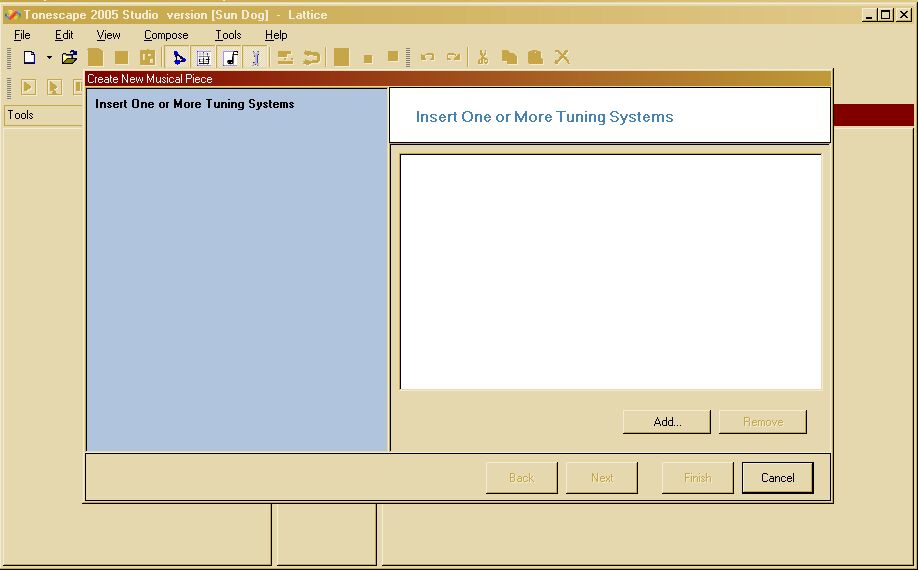
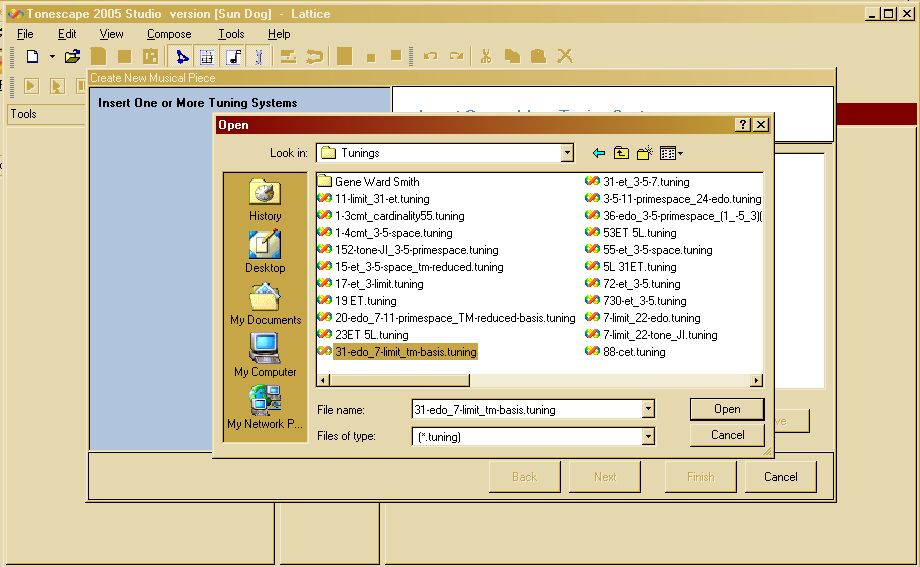
Click the "Add" button. Go to the folder where you have your .tuning file stored, and select it.
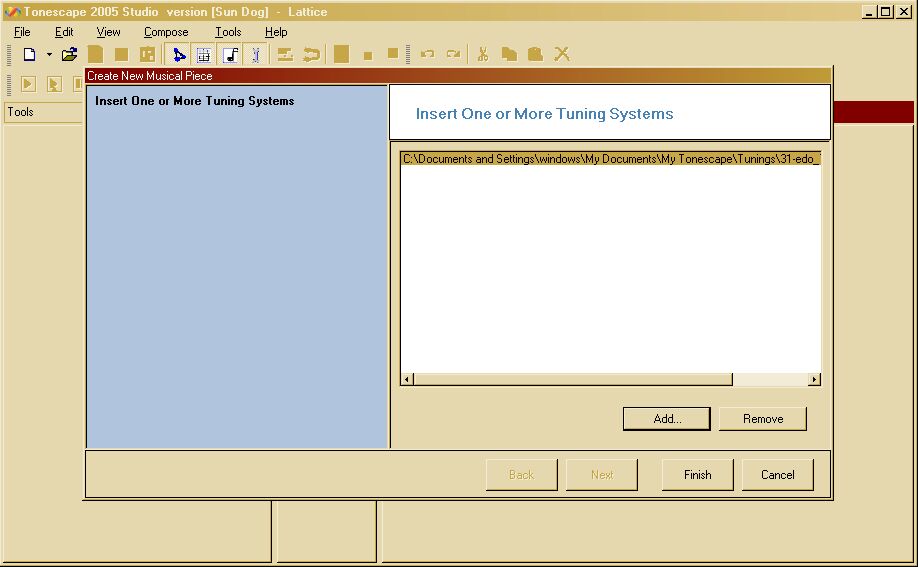
There's no point in selecting more than one tuning yet, so when you've selected your one tuning, click the "Finish" button.
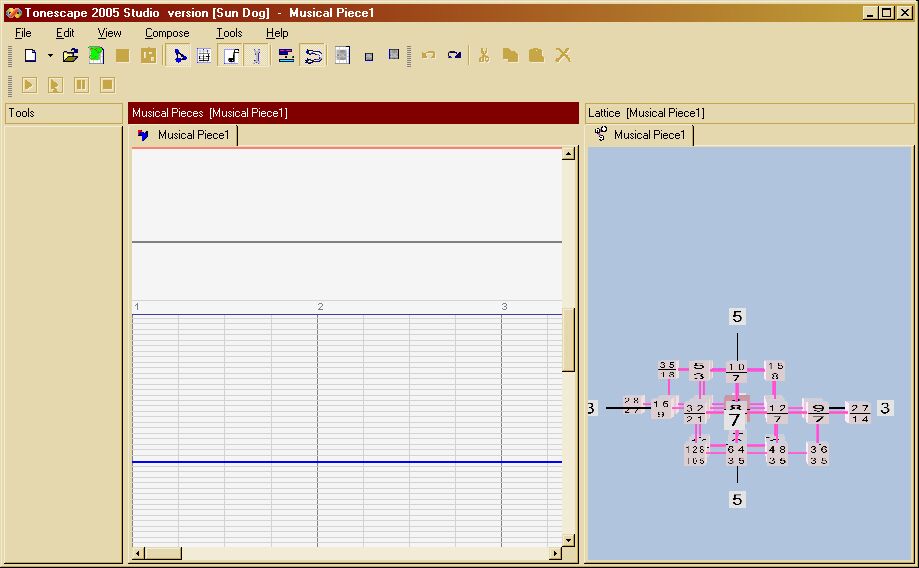
Tonescape opens both the Lattice of your tuning, and the Musical Pieces window.
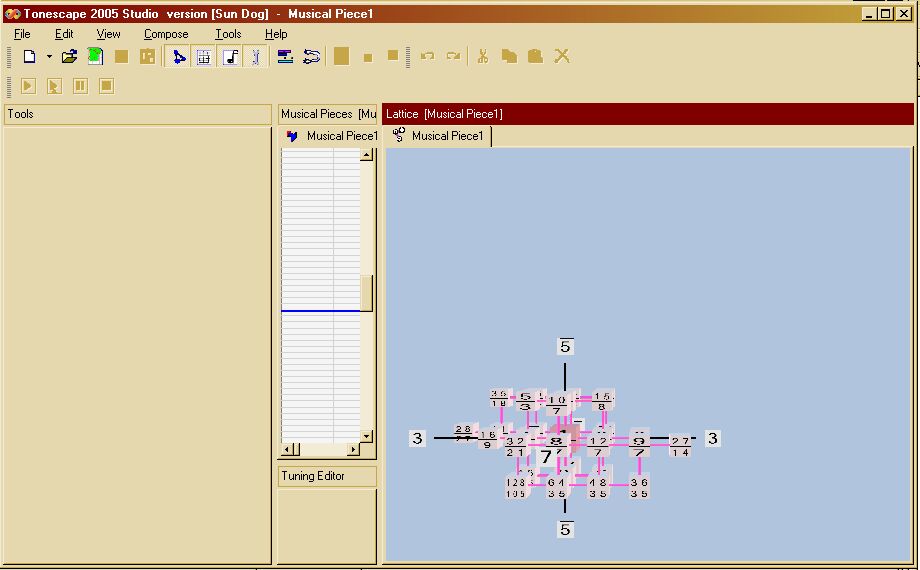
(Right now the Musical Pieces window only provides pitch-height notation. Traditional pythagorean/meantone staff-notation will be available soon with Alpha III, and release 1.0 will probably also include HEWM, Johnston, Monzo 12-edo-staff, and Monzo quarter-tone-staff notations. Sagittal might make it into 1.0 ... if not, then the next release.)
The first thing to do is to make the environment suitable for composing your piece. You may hide the "Tuning Editor" window, since it's not needed here: right-click on the title-bar of that window, and select "Hide View". Also, you'll probably want to make the Musical Pieces window the largest one in the environment: resize it by dragging the sides of the window when the mouse cursor turns into a black double-headed arrow.

The first thing to become familiar with is the row of buttons on the toolbar which affect the Musical Pieces window. Hovering the mouse cursor over a button for about one second will show a tool tip which displays the name of that button.
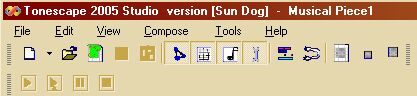
Directly under the menu word "Tools", the button with the white square and the 16th-note (semiquaver) allows you to show and hide the Musical Pieces window itself.
The buttons which control features of the Musical Pieces window begin under the menu word "Help".
The button with the pink, green, and blue rectangles opens and closes the Outline View, which will be explained in more detail below.
The button with the bad drawing of two outstretched arms opens and closes the Conductor View, which will be explained in detail below.
The last three buttons in this toolbar control how far in and out you can zoom on the Musical Pieces window.
The button with the large square on it zooms in, to allow you to see greater detail, but less area.
The button with the small square on it zooms out, to allow you to see more area but less detail.
The button with the medium-sized square on it means "no zoom", and returns your zoom to the default size.
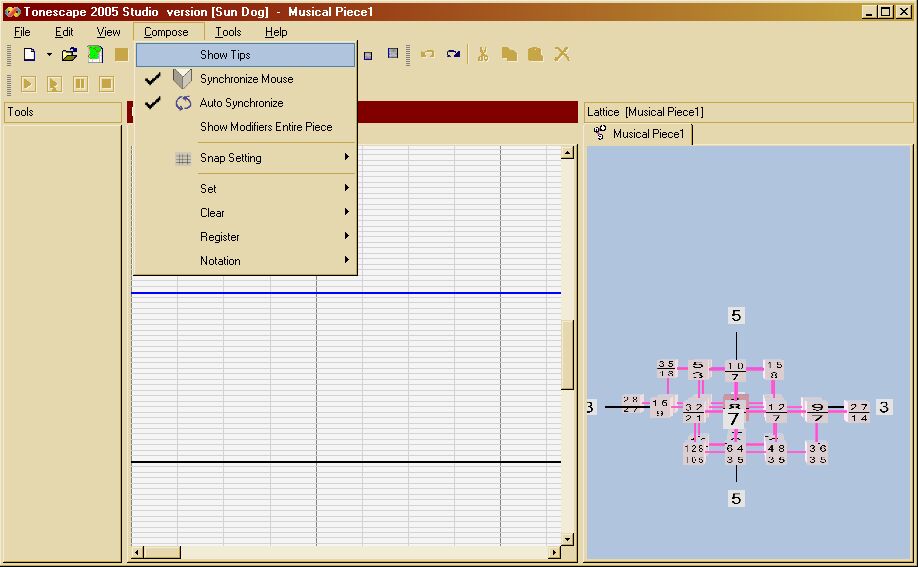
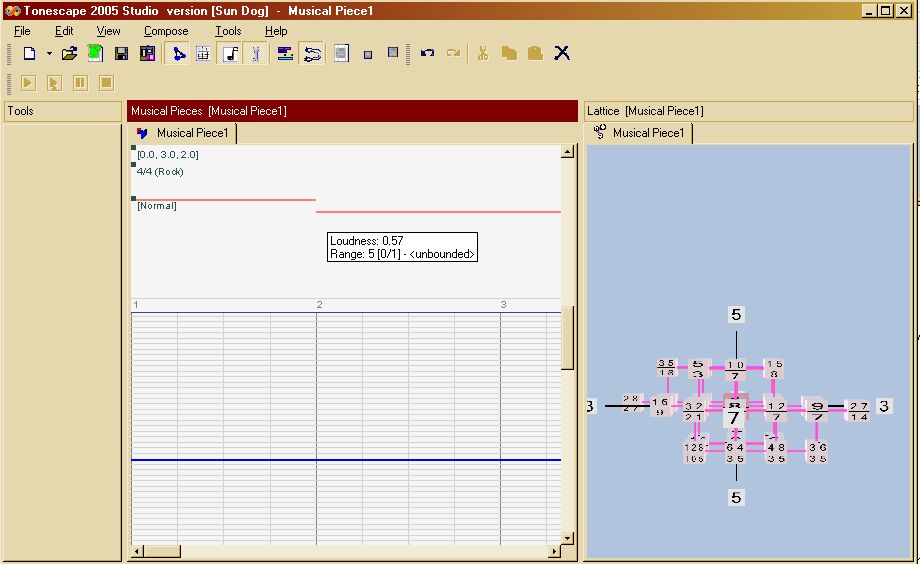
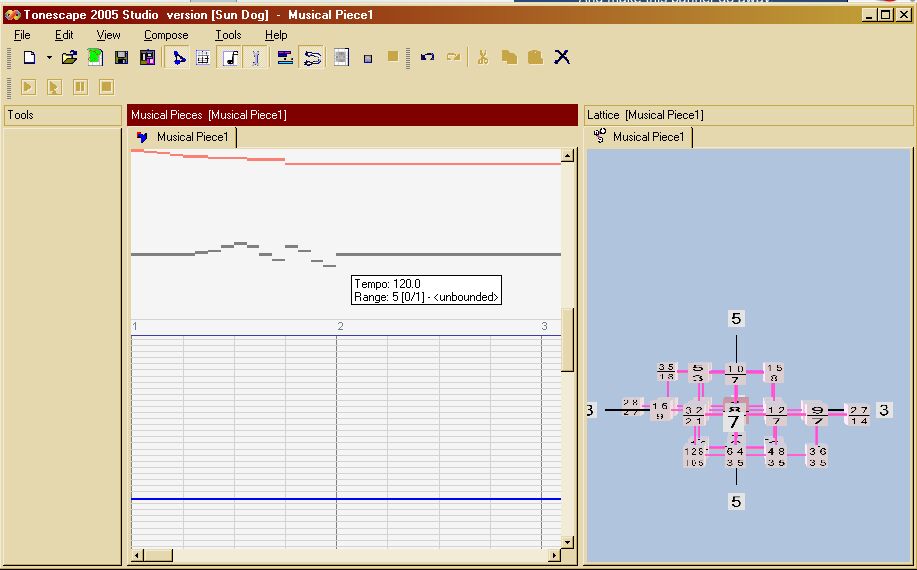
Click on the menu word "Compose" and select "Show Tips" to allow a square balloon to appear, showing the appropriate data for wherever the mouse cursor is hovering over the Musical Pieces window.
"Show Tips" is a very useful feature, particularly when first learning how to use Tonescape to compose. Below is an example (except, unfortunately, the mouse cursor was not captured by the screen-shot):
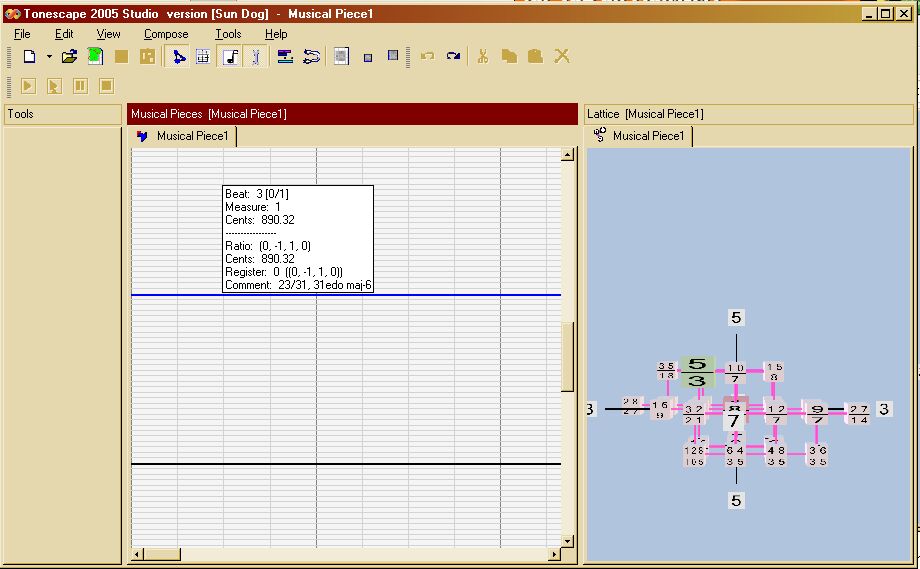
If "Show Tips" gets annoying (which it probably will), just turn it off and on as desired.
The first thing to explore in the Musical Pieces window is the pop-up menu for the Pitch-Height View. Right-click anywhere on the score to bring it up.
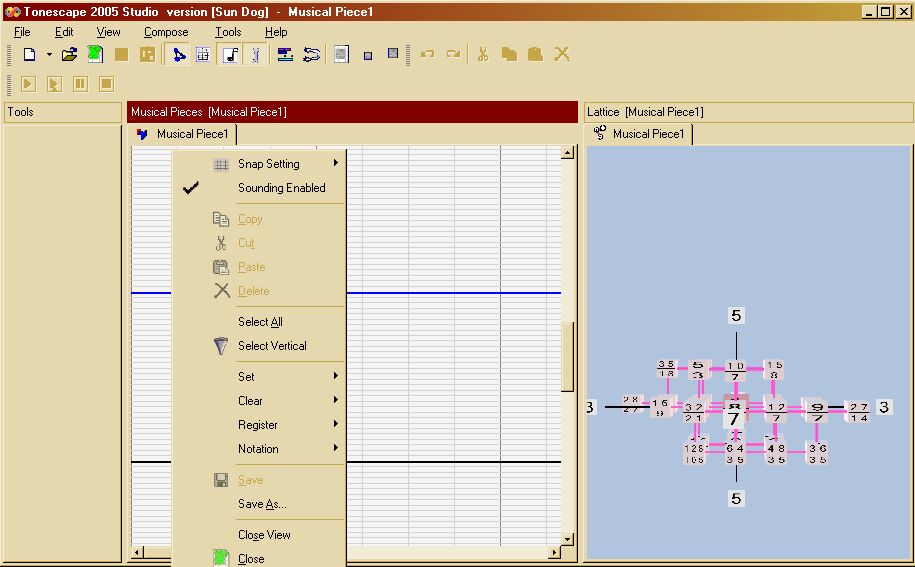
The most important thing to know about here is the "Snap Setting", which selects the rhythmic quantization for your note durations and time placement: the choices are quarter-note (i.e., "4rd" ... i have to get Chris to correct that typo), 8th, 16th, 32nd, 64th, and 128th.
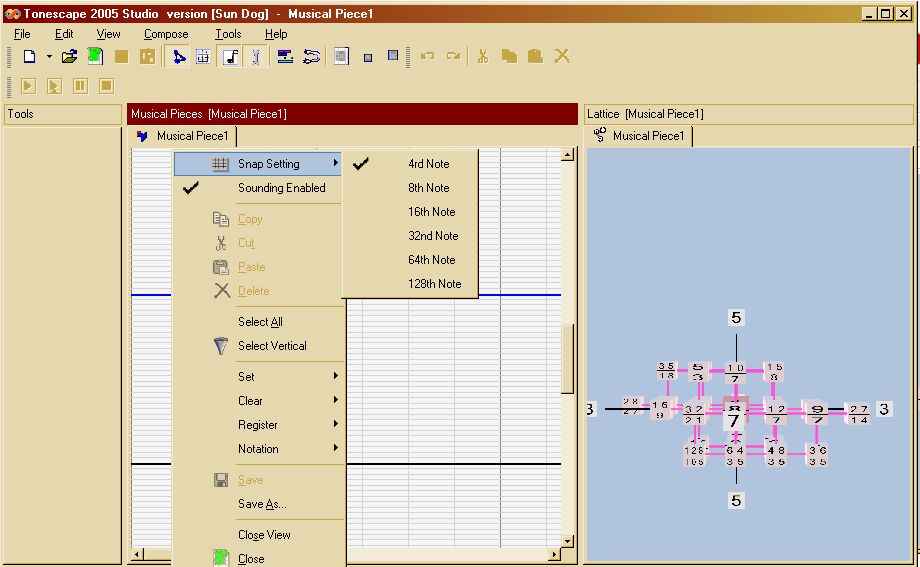
Snap Setting also affects the time placement of all other parameters. Snap Setting is not saved as part of the score, but only exists in real-time for the purpose of editing, and can be changed anytime, anywhere.
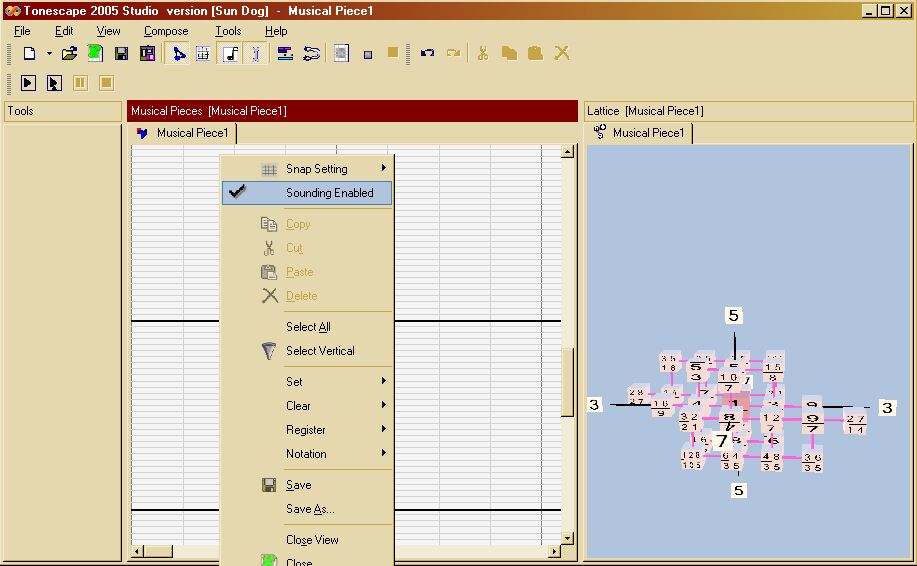
The second useful item on the pop-up menu is "Sounding Enabled", which is checked by default; there will be times when you will want to turn this off while editing your score.
Click the Conductor button on the toolbar (the one with the bad drawing of two outstretched arms) to open the Conductor View in the Musical Pieces window.
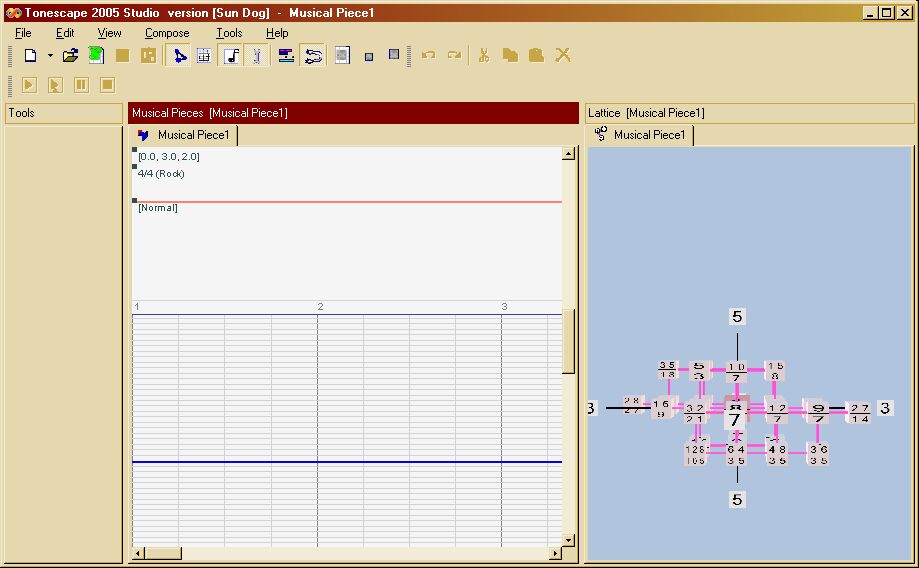
The view which opens first is "normal view", which shows the data for the individual instrument selected. There is another view available, which affects all instruments at once; this will be described below.
This is the section which contains data for spatialization (3D pan), time-signatures, phrasing, volume, and tempo. The time-placement of all of these is affected by the Snap Setting in use. Spatialization, time-signature, and phrasing data is edited by right-clicking on the little black square next to the label when the mouse cursor turns into a hand with a pointing finger; this opens a pop-up dialog or menu with the available choices. The volume and tempo may be changed by left-clicking on the appropriate line and dragging. Details on all this will be given below.
The black squares may be moved according to the Snap Setting, by left-clicking on the square when the mouse cursor turns into a hand with a pointing finger, and dragging the black square to the desired Snap location.
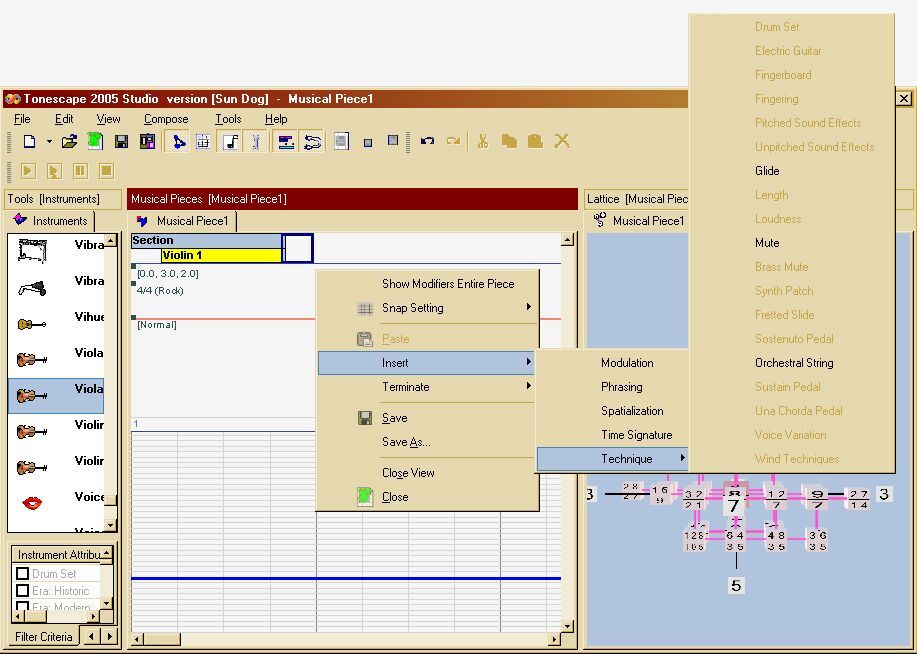
New values for any of these three parameters may be added according to the Snap Setting by right-clicking at the desired time-placement location along the horizontal axis in the white space of the Conductor View, and selecting "Insert", then selecting the appropriate command from the Insert drop-down menu.
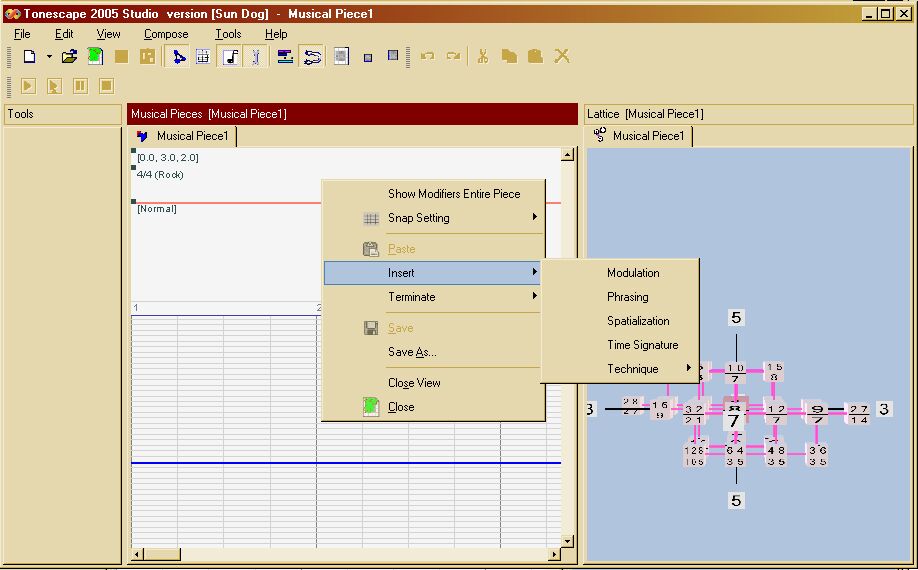
A new time-signature can only be added at an appropriate time-placement location determined by the existing time-signature -- i.e., if your first time-signature is 4/4, you can only insert a new one at the beginning of each four-beat measure. Note that in our example screen-shot, the left edge of the menu appears at the beginning of the second measure, which is the horizontal location which was clicked, thus, the "Time Signature" choice is enabled.
The "Insert | Technique" choice is specific to the type of instrument -- these will be explained in more detail below.
Details on editing the spatialization, time-signature, and phrasing conductor parameters follow.
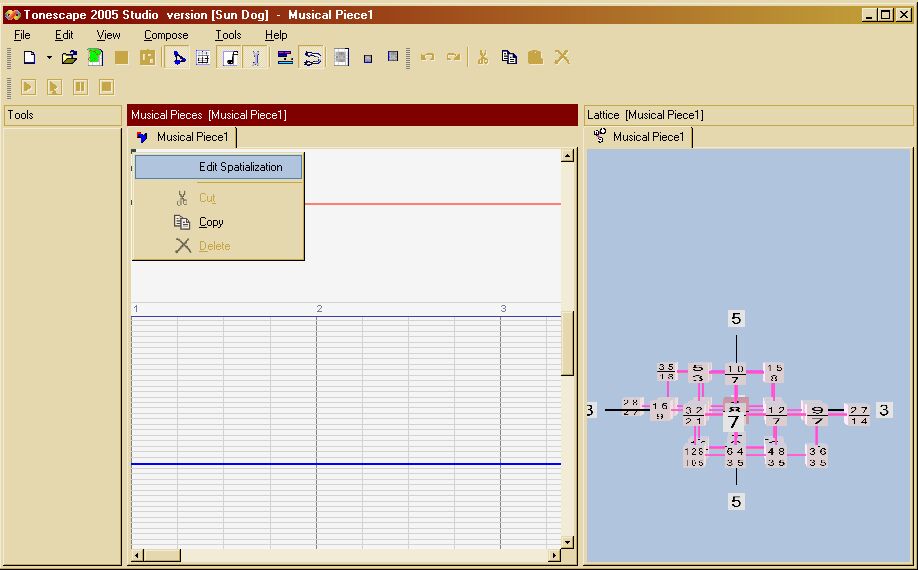
The black square at the top, with the default data "[0.0, 3.0, 2.0]", contains the spatialization or 3D pan data. Right-click on the black square and select "Edit Spatialization" from the pop-up menu to change the spatialization data.
This opens the spatialization data dialog, where you can enter values for X (left-to-right), Y (up and down), and Z (front-to-back) to pinpoint the location of that instrument's sound in 3D space. Working in MIDI, only the X left-to-right axis applies, and currently, the same is true of .wav files; panning on the Y and Z axes will be implemented in the future. (Note that 3D spatialization will only be audible with the appropriate speaker set-up. Regular stereo speakers will only give the X left-to-right value.)

When finished editing the spatialization, press the "Enter" key on the keyboard to accept your edits, or press the "Esc" key to abandon them.
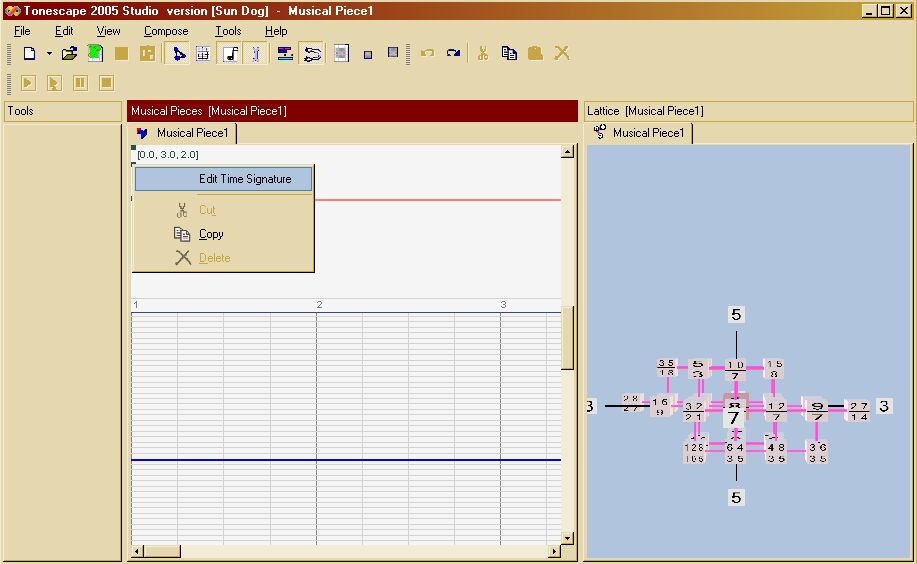
The black square vertically in the middle in the Conductor View controls the data for the time-signatures. Numerators and denominators of time-signatures are edited separately.
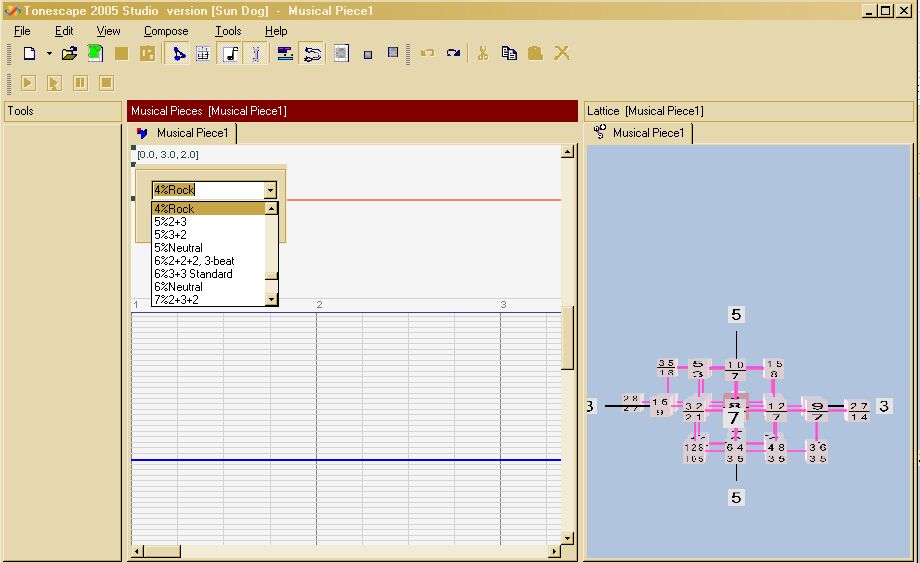
Tonescape can build complex accent patterns into your time-signatures if you select a numerator choice other than "neutral". Eventually, Tonescape will have a time-signature editor which allows the user to create complex time-signaturesof his/her own design ... for now, there is a wide variety of time-signature numerators available in a drop-down list. Right-click on the black time-signature square when the mouse cursor is a hand with a pointing finger, to open the time-signature menu.
Select "Edit Time Signature" to open the Time-signature Editor which will allow you to select numerators and denominators from the respective drop-down lists. (Please ignore the % sign in the numerator, it will be removed later).
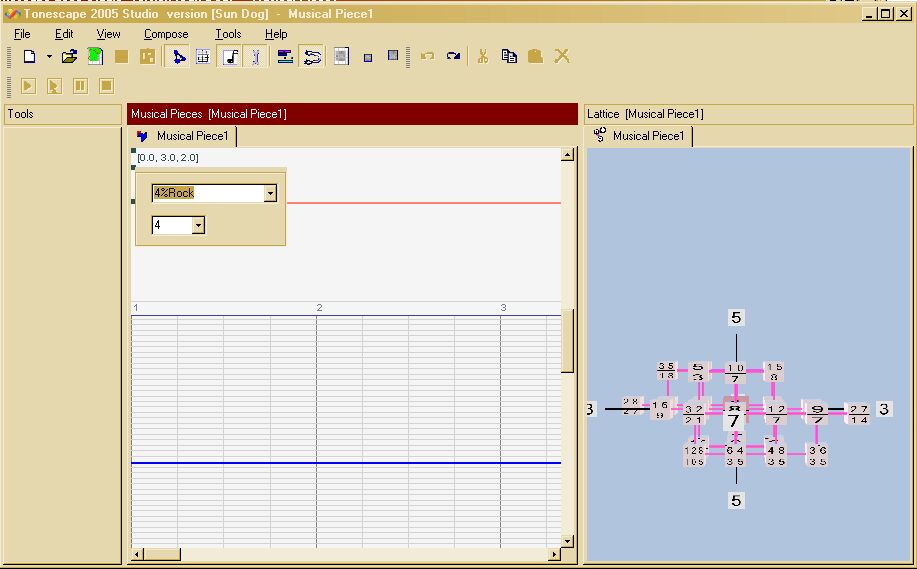
The top box shows the numerator, followed by the unnecessary %, followed by a name which describes the accent pattern. Click on the little arrow to the right of the numerator box to open the drop-down list of numerator choices.
The bottom box shows the standard denominator choices of 1, 2, 4, 8, 16, and 32.
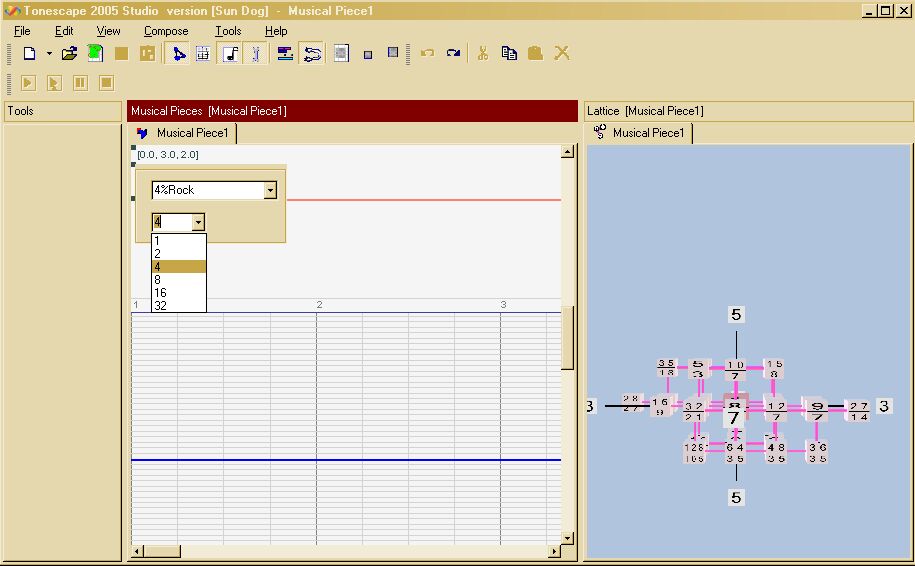
When finished editing the time-signature, press the "Enter" key on the keyboard to accept your edits, or press the "Esc" key to abandon them.
Tonespace has very powerful Time Signature capability: in addition to providing built-in accent patterns for your meters, you may also use different time signatures with your different instrumental parts.
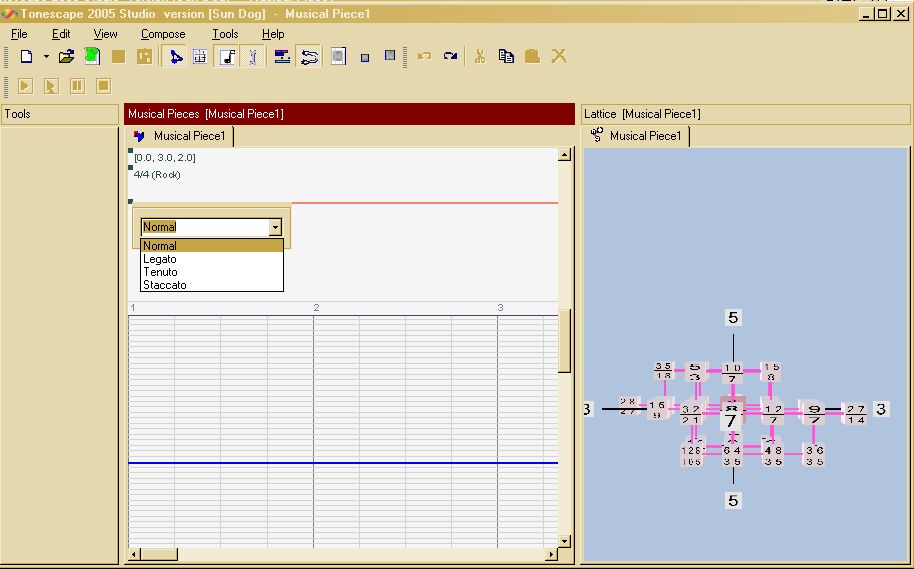
The black square vertically at the bottom in the Conductor View contains the Phrasing data. The default phrasing value is "Normal", which means that each note is distinctly detached from the one following. Right-click on the black Phrasing square when the mouse cursor is a hand with a pointing finger, to open the phrasing menu.
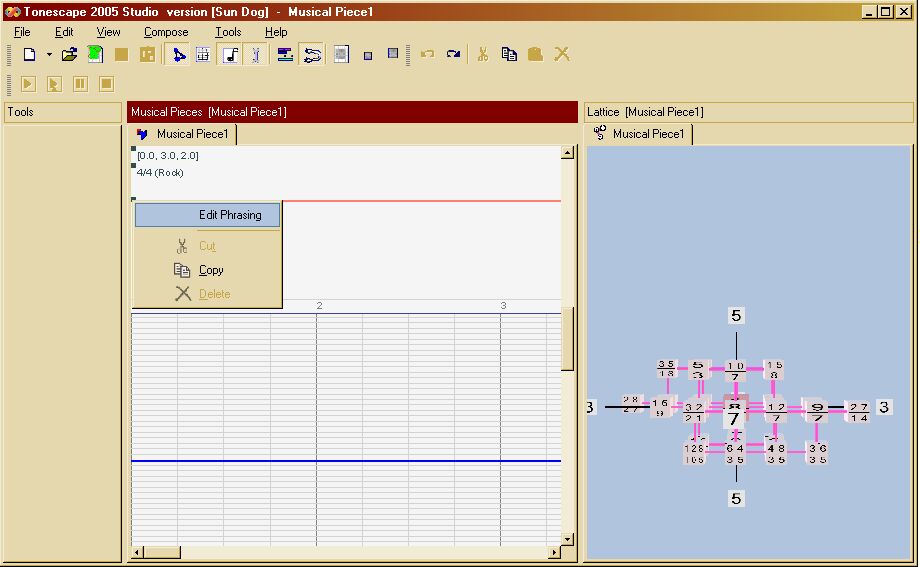
Select "Edit Phrasing" to open the Phrasing Editor which will allow you to select from the drop-down list.
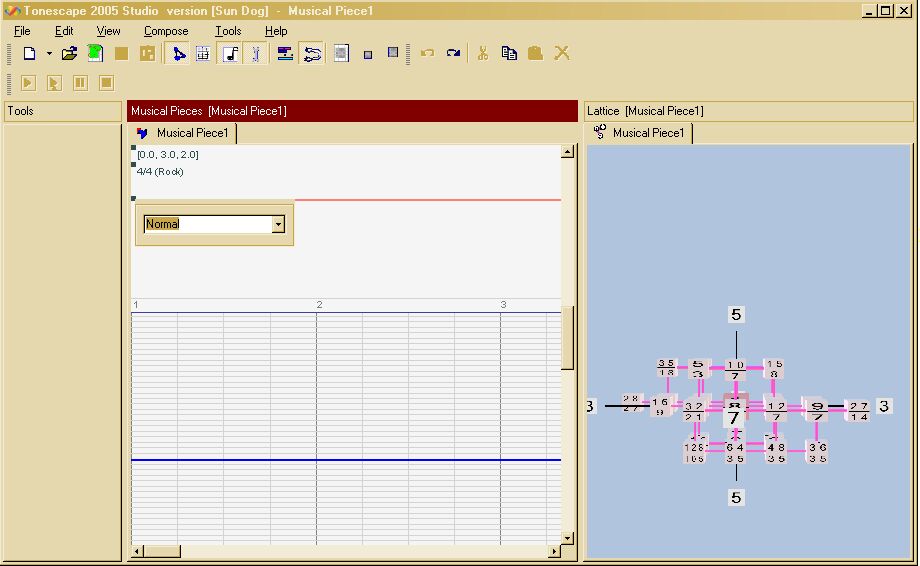
The box shows the selected type of phrasing. Click on the little arrow to the right of the box to open the drop-down list of phrasing choices: Normal, Legato, Tenuto, Staccato.
When finished editing the phrasing, press the "Enter" key on the keyboard to accept your edits, or press the "Esc" key to abandon them.
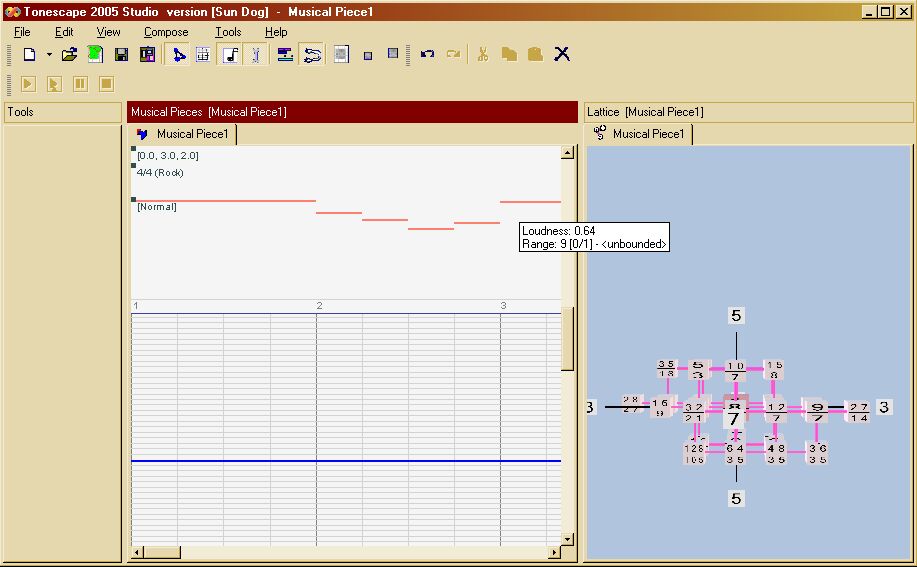
The red horizontal line running across the Conductor View represents the volume for the selected instrument. Hover the mouse over the line so that the cursor turns into a hand with a pointing finger, then click and drag the line vertically to change the volume.
Hold down the "Shift" key on the keyboard and click on the line, to drag it from that Snap point and including all points to the right.
Hold down the "Ctrl" key on the keyboard and click on the line, to drag only one segment (based on Snap Setting) of the line.
Right-click anywhere on the white space in the Conductor View to open the pop-up menu, and select "Show Modifiers Entire Piece" to change the view so that you can edit the global parameters of volume and tempo. Edits in this view affect every instrument in the piece simultaneously.
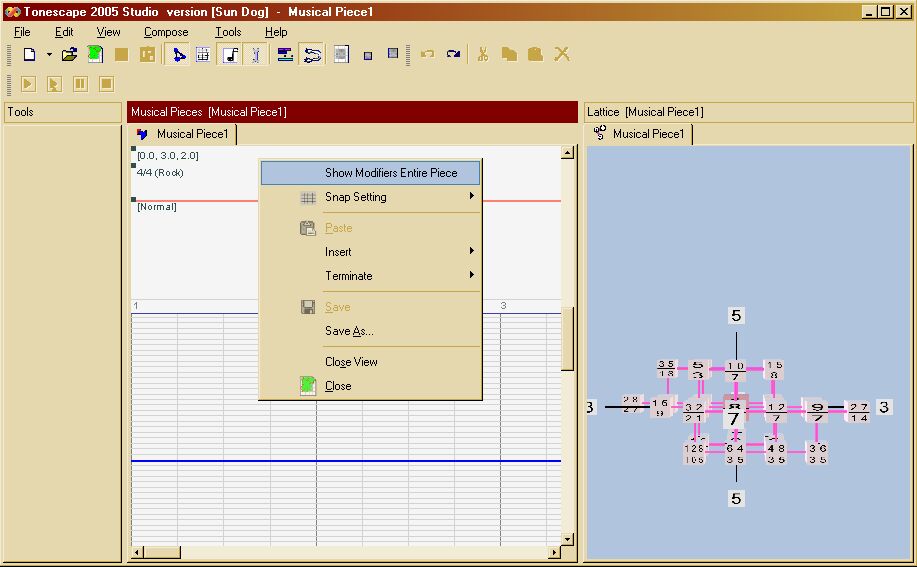
The "Show Modifiers Entire Piece" view right now is very spartan: it contains only a red horizontal line which represents global volume, and a gray horizontal line which represents tempo.
Editing of both the global volume and tempo lines works exactly the same way as described in 6.d. ("individual instrument volume") above. In the example below, we have a Snap Setting of "16th", and have modified both the global volume and tempo.
Click the Outline button on the toolbar (the one with the pink, blue, and green rectangles) to open the Outline View.
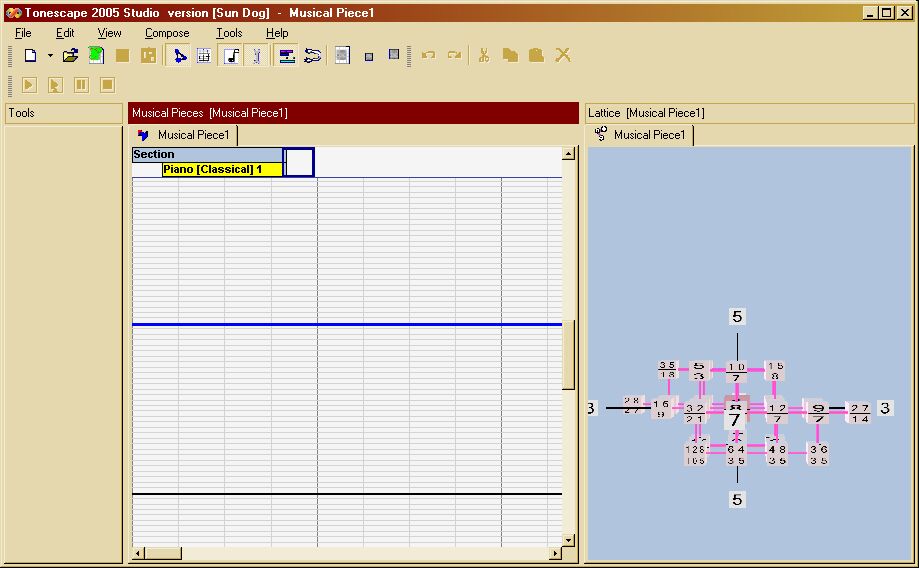
This is where you set up the Sections and Parts of your piece in a block outline. I'll explain the detailed workings of this in a future post ... for now, just know how to add more parts:
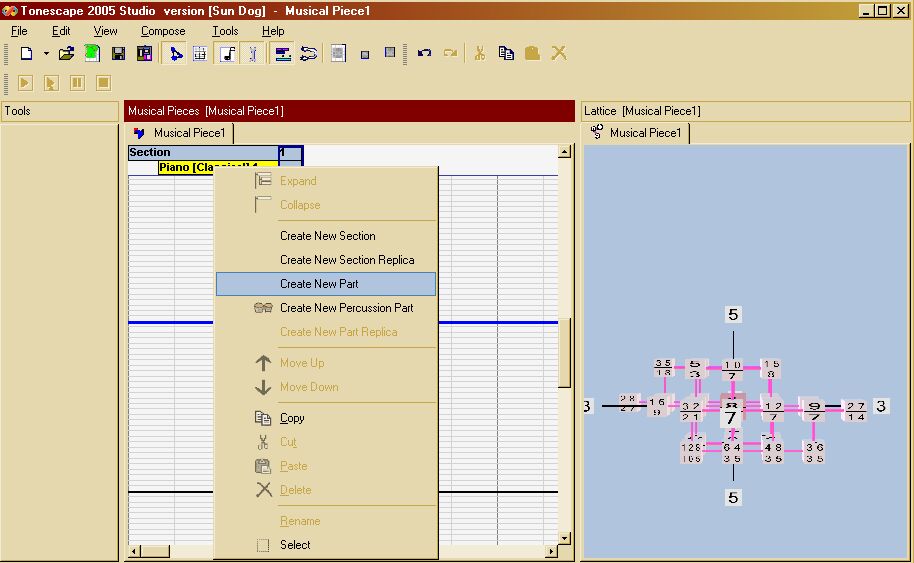
Right-click on the single part (default instrument is Piano [Classical] 1) and select "Create New Part" from the pop-up menu
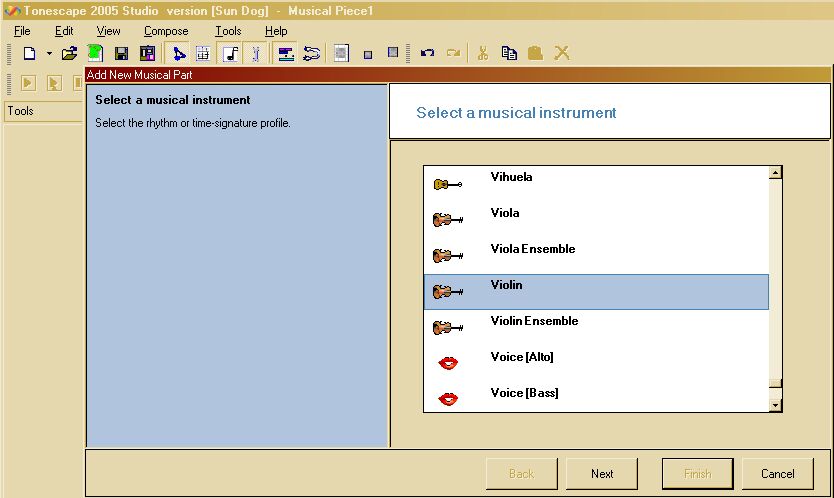
The "Select a musical instrument" dialog box opens up. Select the instrument you want from the list -- in our example we chose "Violin". Click the "Next" button.
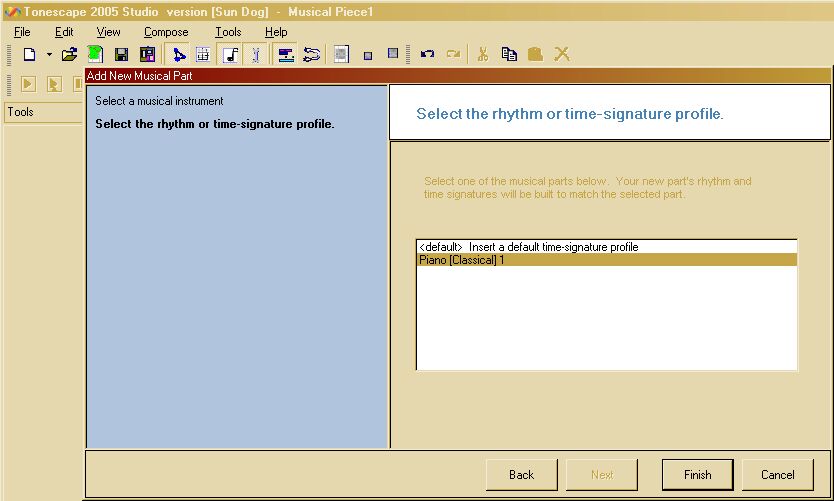
The "Select a rhythm or time-signature profile" dialog opens up. If you changed the time-signature of your first instrument, you may choose either that profile or the default. In our example here, we choose the time-signature of our first instrument, which is what most users will do most of the time. (But remember, different instrumental parts can use different time-signatures if desired!)
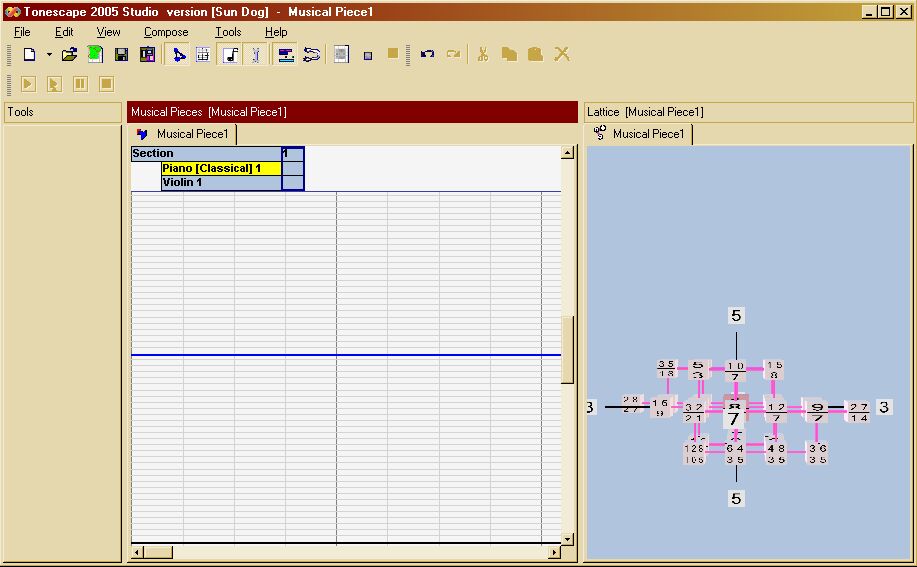
The screen-shot below shows the new Violin part added to the Outline View:
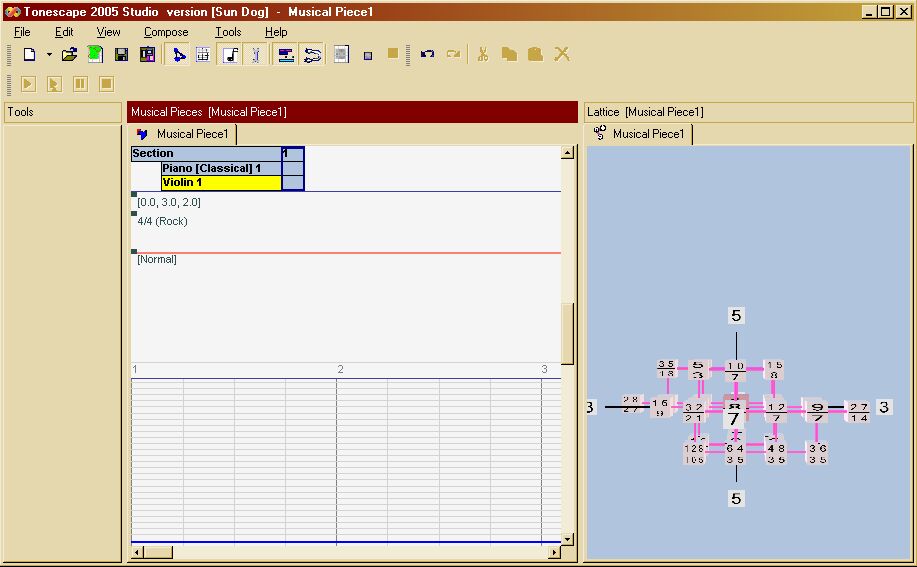
Left-click on the new part to select it, and if you now open the Conductor View you see the individual data for the selected instrument:
As we said earlier, the "Insert | Technique" choice is specific to the type of instrument selected. For example, if the instrument is a piano, techniques include Sostenuto Pedal, Sustain Pedal, and Una Chorda Pedal; if the instrument is a violin, techniques include Glide, Mute, and Orchestral String:
And the latter selection gives a choice of Arco, Pizzicato, Spiccato, and Tremolo; etc.
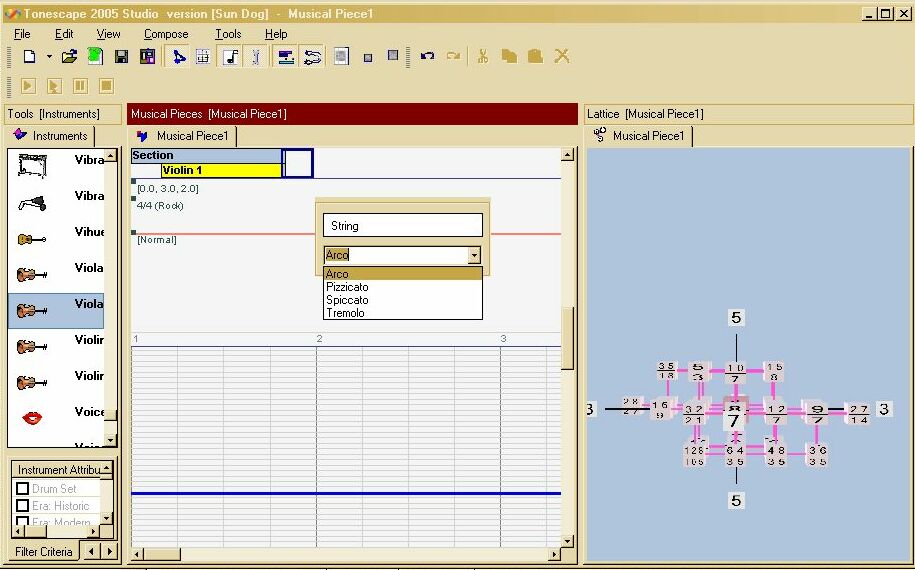
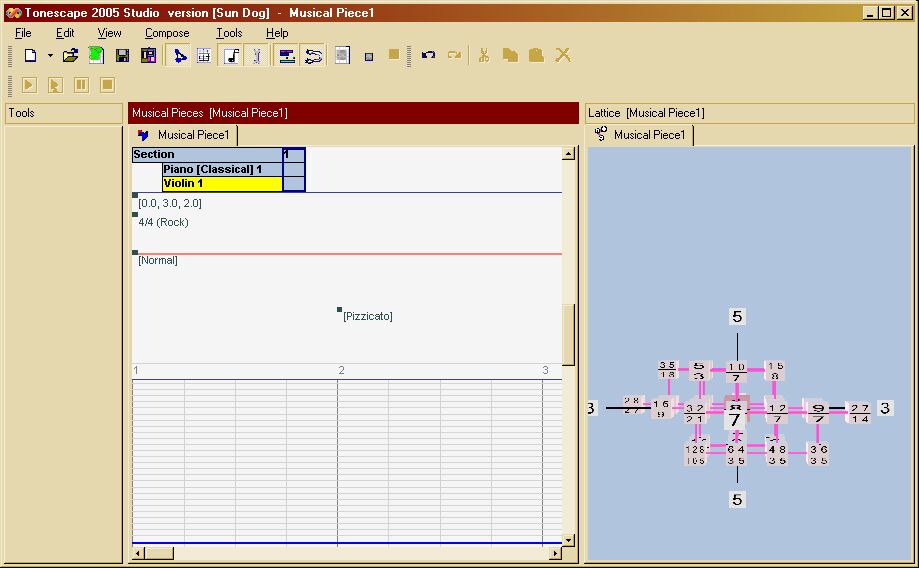
We'll add a change of technique to the Violin part at the beginning of measure 2, so that it will play Pizzicato beginning at that point:
Eventually, Tonescape will allow MIDI input from a keyboard or other device in addition to composing directly on the computer screen; right now, only the latter is available.
Composing in the Pitch-Height View is simply a matter of dragging notes onto the score from the Lattice, or even more simply, just clicking on the appropriate vertical cell on the Pitch-Height score. You may also select entire chords on the Lattice and drag them over as a unit. The starting-point for each note that you drag or click-on is determined by the Snap Setting, which may be changed at any time without affecting any notes that have already been entered.
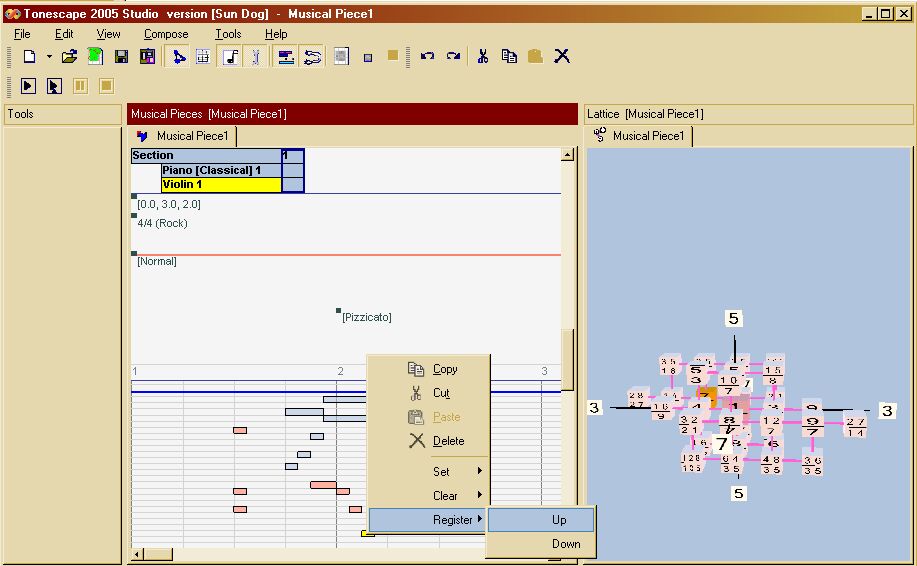
Notes on the Lattice are usually "normalized" within one register (i.e., within one octave in most cases). When they are dragged to the score they appear in that register. Right-click on the note and select "Register" from the pop-up menu, then select "Up" or "Down" to move the note to a new register, incrementally by one register at a time.
When notes are first inserted, or when they already exist and are clicked again, they are "selected" and appear yellow. When they are not selected, they appear pink. If a whole set of notes are selected, they may be de-selected by making sure that the mouse cursor is over the Musical Pieces window (thus making it the active window), and pressing the "Esc" key on the keyboard. Also, if having the notes sound becomes annoying while working, "Sounding Enabled" can be turned off and on as desired, from the Pitch-Height right-click pop-up menu.
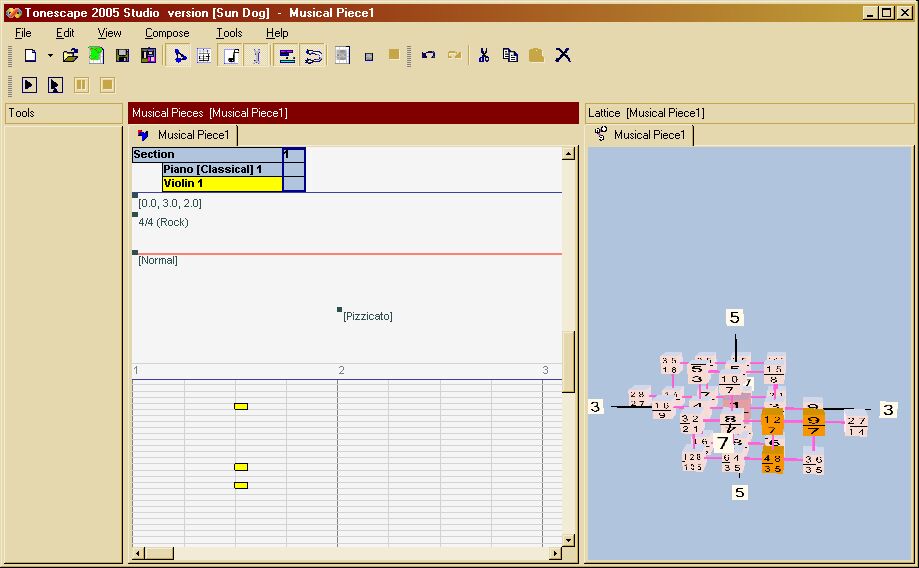
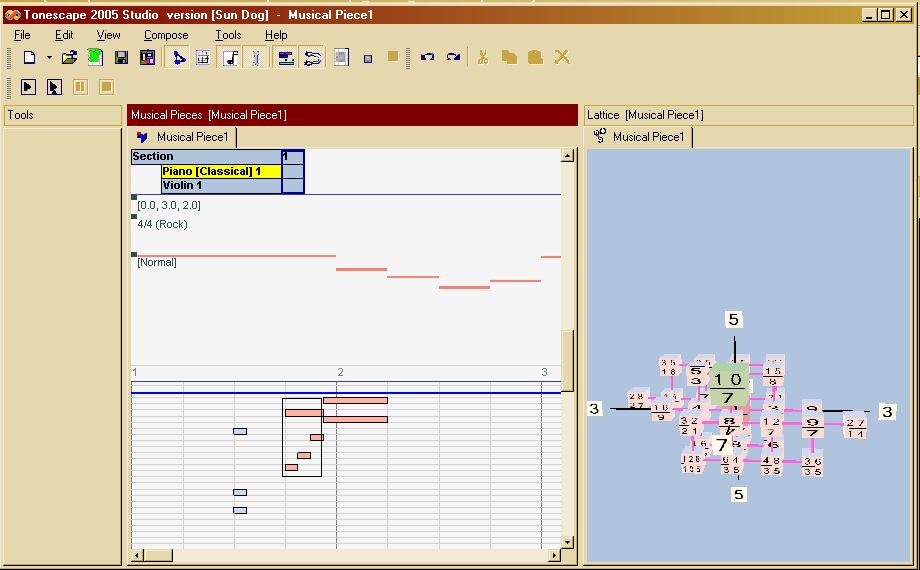
When another part is selected, the notes already existing on the first part appear in gray, while any new notes entered on the selected part appear in red if unselected and yellow if selected; in our example, we've added some notes on the piano part, and the last two entered are still selected, while the notes in the violin part are still visible in gray:

Note durations may be lengthened according to the Snap Setting, by hovering the mouse over the right edge of the note until the cursor appears as a thin black double-headed arrow, and dragging left or right to the selected duration. Notes may be moved in time (horizontally) according to the Snap Setting, and in pitch (vertically) according to the quantization offered by the tuning, by hovering the mouse over the note until the cursor appears as a hand with a pointing finger, then dragging the note to the desired location. Both of these operations affect all selected (i.e., yellow) notes simultaneously.
A whole group of notes in one instrumental part may be selected by holding down the "Ctrl" key on the keyboard and dragging the mouse over the Pitch-Height score, to make a box around the selected notes.
Upon releasing the mouse button, all notes in that part which lie within the box will be selected (yellow), and will all sound simultaneously if "Sounding Enabled" is turned on -- this is an example of when you might want to turn it off.
To copy a whole bunch of notes from one place in the score to another, or from one instrumental part to another, select the desired notes either one at a time or with the "Ctrl"-box method, then when the notes are yellow, press "Ctrl-c" on the keyboard to copy the note data to the clipboard, then place the mouse cursor (without clicking) at the desired point of insertion for the copy, and press "Ctrl-v" on the keyboard. An exact copy of the notes will be inserted at that point. Then, the whole set of notes may be moved in time or pitch as a group, or individual notes may be modified as desired.
Tonescape allows you to listen to "vertical slices" of your score outside of the real-time flow of tempo. You may listen to "vertical slices" of an individual part by holding down the "Alt" key on the keyboard and clicking on the Pitch-Height score -- the notes you hear are determined by the Snap Setting. You may listen to "vertical slices" of all parts in your piece by holding the "Alt" and "Ctrl" key simultaneously and clicking on the Pitch-Height score.
That should be enough to get you started writing your own Musical Pieces in Tonescape. Happy composing!