Tonescape was created 2003 to 2007 specifically for Windows XP.
It continued to install and run on Windows Vista, 7, 8, and 10.
But Microsoft has kept updating subsequent versions of Windows, and as
a result Tonescape may or may not install natively in Windows 10 or 11. Also, many users
run other operating systems, specifically Linux and MacOS. Virtual machines
have been created which now enable Tonescape to run on any of these systems.
This page is specifically for users who run an Intel-CPU Mac
released before June 2020 and running macOS 15 Sequoia or later.
Tonescape / Windows XP VM for Intel MacOS
Download and install VMware Fusion first (~500 MB, instructions below), then
BE SURE TO HAVE AT LEAST 17 GB OF FREE DISK SPACE AVAILABLE BEFORE DOWNLOADING THE VM !
This Tonescape VM is currently running perfectly on an Intel i7 Macbook Pro (model A1990), in MacOS Sequoia running VMware Fusion 25H2.
It should run on any Intel-based Mac using MacOS 15 Sequoia or later. Users who have an older Intel Mac may have success with an older
version of VMware Fusion (i.e., VMware Fusion 13 on macOS 12 Monterey or later) but this has not been tested.
INTEL MAC - VMWARE FUSION GUIDE
This guide will help you run Tonescape (Windows XP version) on an Intel Mac
using VMware Fusion, with full MIDI sound support.
PART 1: OBTAINING VMWARE FUSION
VMware Fusion is now FREE for everyone, but Broadcom (the owner) DOES NOT
ACCEPT free public email addresses (Gmail, Yahoo, Outlook.com, etc.) when creating
a download account. If you don't already have a Broadcom account,
you need an email address from a company, organization, or educational institution.
If you don't have access to a company email: You will need to ask a friend
or colleague who does, to download the installer for you. There is no legal
way around this restriction, as Broadcom's license prohibits redistributing
the installer.
STEP-BY-STEP DOWNLOAD INSTRUCTIONS
CREATE A BROADCOM ACCOUNT
- Go to https://support.broadcom.com
- Click "Register"
Use your COMPANY/ORGANIZATION EMAIL ADDRESS (Gmail/Yahoo will be rejected)
Complete the registration process
NAVIGATE TO THE DOWNLOAD PAGE
- Log in to your Broadcom account
- Look for "My Downloads" in the left navigation menu
- Click "Free Software Downloads available HERE" (text link)
- From the list of products, click "VMware Fusion"
You will see two versions:
- VMware Fusion (for Mac)
- VMware Workstation Pro (for Windows - ignore this)
SELECT THE CORRECT VERSION
On the VMware Fusion page, you'll see a table with these versions:
- VMware Fusion 25H2
- VMware Fusion 13
DOWNLOAD VMWARE FUSION 25H2 (newer version, confirmed working).
THE "TERMS AND CONDITIONS" REQUIREMENT
- The download link will be GREYED OUT and UNCLICKABLE
- Look for a blue text link that says "Terms and Conditions"
- CLICK IT - this opens a new browser tab with the license agreement
- LEAVE THAT NEW TAB OPEN (critical!)
- Go back to the original download page tab
- The "I agree to the Terms and Conditions" checkbox will now be CLICKABLE
- Check the box
- Click "DOWNLOAD NOW" (text link)
- The download will begin
PART 2: SETTING UP THE TONESCAPE VM
WHAT YOU'LL NEED
- The Tonescape VM disk image (tonescape-xp.vmdk - in the link inside the box directly under the "Tonescape / Windows XP VM for Intel MacOS" title)
- VMware Fusion 25H2 installed on your Mac
CREATING THE VIRTUAL MACHINE
LAUNCH VMWARE FUSION
START VM CREATION
- Select "Create a custom virtual machine"
- Click Continue
CHOOSE OPERATING SYSTEM
- Select "Microsoft Windows"
- From the version dropdown, choose "Windows XP Home Edition"
- Click Continue
SELECT THE VIRTUAL DISK
- Choose "Use an existing virtual disk"
- Navigate to and select your tonescape-xp.vmdk file
- When prompted, select "Make a separate copy of the virtual disk"
- Click Continue
NAME AND SAVE
- Name your VM (e.g., "Tonescape XP")
- Choose a save location (your Downloads folder is fine)
- Click "Customize Settings" (important - do not click Finish yet)
CONFIGURING VM HARDWARE
In the Settings window:
PROCESSORS & MEMORY
- Click on "Processors & Memory"
- Set MEMORY to 3584 MB
- Set PROCESSORS to 2 cores
- Close the settings panel
DISPLAY (Critical for Tonescape)
- Click on "Display"
- Check "Accelerate 3D graphics" (VMware will note that 3D acceleration requires VMware Tools - ignore for now)
SOUND (Leave default for now)
- Under Removable Devices, ensure "Sound Card" is connected (checked)
NETWORK (Optional)
- If you don't need internet, you can disable the network adapter
- Under Removable Devices, uncheck "Network Adapter"
ADVANCED SETTINGS (Performance)
- Click on "Advanced"
- Check "Disable Side Channel Mitigations" (improves performance)
FIRST BOOT
START THE VM
- Click the PLAY button
- Windows XP will boot from the disk image
CURSOR CONTROL
- Click inside the VM window to capture the cursor
- To release the cursor back to macOS, press COMMAND + OPTION
VMWARE TOOLS (Optional)
- VMware Tools for Windows XP is no longer included with Fusion
- The VM will run fine without it, but 3D acceleration won't be fully utilized
- If you want to install it, download VMware-tools-10.3.25-20333152.iso from VMware's archives and attach it to the VM's CD/DVD drive
CRITICAL MIDI FIX (REQUIRED FOR TONESCAPE SOUND)
- Tonescape uses General MIDI for all audio. The default Fusion settings won't work - you must add these configuration lines:
SHUT DOWN THE VM completely
LOCATE THE VM PACKAGE
- In Finder, go to where you saved your VM
- Look for a file named "Tonescape XP.vmwarevm" (it appears as a single file)
- RIGHT-CLICK on it and select "Show Package Contents"
EDIT THE CONFIGURATION FILE
- Find the file named "Tonescape XP.vmx" (or similar)
- Double-click to open it with TextEdit
- Scroll to the VERY BOTTOM of the file
-
ADD THESE TWO LINES:
sound.mpu401.host = "TRUE"
sound.virtualDev = "sb16"
- Save the file (File > Save) and close TextEdit
RESTART THE VM
- Close the package window
- Start the VM again from VMware Fusion
TESTING TONESCAPE
- Once Windows XP is booted, navigate to your Tonescape installation
- Launch Tonescape
- You should now have full MIDI audio working
If you don't hear sound, check Windows XP's sound settings:
- Go to Control Panel > Sounds and Audio Devices
- Click the AUDIO tab
- Under "MIDI music playback," ensure a device is selected
TROUBLESHOOTING
NO MIDI SOUND AFTER ADDING .VMX LINES
- Verify the lines were saved correctly (no typos)
- Ensure the VM was fully shut down before editing
- Try rebooting Windows XP after the changes
VM RUNS SLOWLY
- Verify "Disable Side Channel Mitigations" is checked
- Ensure you allocated enough memory (3584MB recommended)
- Check that 3D acceleration is enabled
CAN'T RELEASE CURSOR FROM VM
- Press COMMAND + OPTION together
- If that doesn't work, try pressing CONTROL + OPTION
VM TESTED ON THIS SYSTEM:
- MacBookPro15,1 (CPU: Intel Core i7, GPU: Radeon Pro 560X)
- macOS Sequoia 15.7.1
- VMware Fusion 25H2
macOS Sequoia supports the following Intel-based Mac models, provided they meet the minimum release year requirements:
- MacBook Air: 2020 (Model identifier: MacBookAir9,1). Note that 2018 and 2019 Intel MacBook Air models are not supported.
- MacBook Pro: 2018, 2019, and 2020 models (Model identifiers: MacBookPro15,1-15,4 and MacBookPro16,1-16,4).
- iMac: 2019 and 2020 models (Model identifiers: iMac19,1, iMac19,2, iMac20,1, iMac20,2).
- iMac Pro: 2017 model (Model identifier: iMacPro1,1).
- Mac mini: 2018 model (Model identifier: Macmini8,1).
- Mac Pro: 2019 model (Model identifier: MacPro7,1)
===============================================================================
For questions or support, contact: Joseph Monzo via Facebook Messenger
===============================================================================
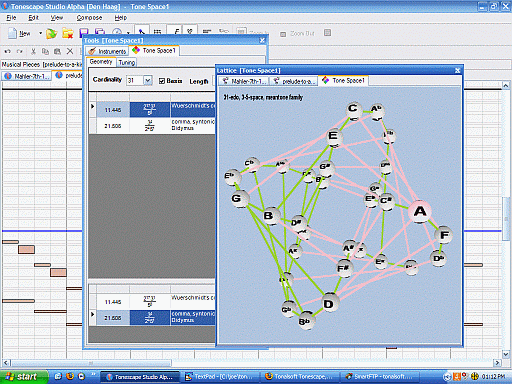
For an overview of Tonescape, visit this page, and
be sure to read the tutorials to learn how to use it.
. . . . . . . . .

